![logo-effectconnect-liggend-2021.png]](https://www.effectconnect.com/hs-fs/hubfs/Logo%20EffectConnect/logo-effectconnect-liggend-2021.png?height=24&name=logo-effectconnect-liggend-2021.png)
With attributes, you describe your products: colour, size, material. This lets you describe, filter and compare products consistently. There are three building blocks that build on each other:
| Building block | What it is | Example |
|---|---|---|
| Attribute | A single property of a product | Colour |
| Attribute group | Attributes you always fill in together | Group "Dimensions" with length, width and height |
| Attribute template | Individual attributes and groups for a kind of product | Template "Trousers" with the groups "Colour and design" and "Fit and sizing" |
The order of working is therefore: attributes first, then groups, then templates. You create everything within a catalog in which you create products yourself.
Go to:
- How to start
- Creating an attribute
- Editing an attribute
- Creating an attribute group
- Creating an attribute template
- Linking attributes to a product
How to start
- Go to Catalog > Product management and choose Attributes, Attribute groups or Attribute templates.
- Click New. Do you have more than one catalog in which you create products? Then first choose which catalog the attribute, group or template goes in.
If you have more than one catalog, each overview shows an extra column with the catalog name (with an icon you can click through). You can filter and sort on that column.
🔗 See also: would you like to know more about working with multiple catalogs? Read the article What is Catalog Management and how do I work with multiple catalogs?
Creating an attribute
- Under New in the Attributes overview, choose the catalog (only if you have more than one catalog).
- Fill in the name of the attribute.
- Choose the type (see the table below).
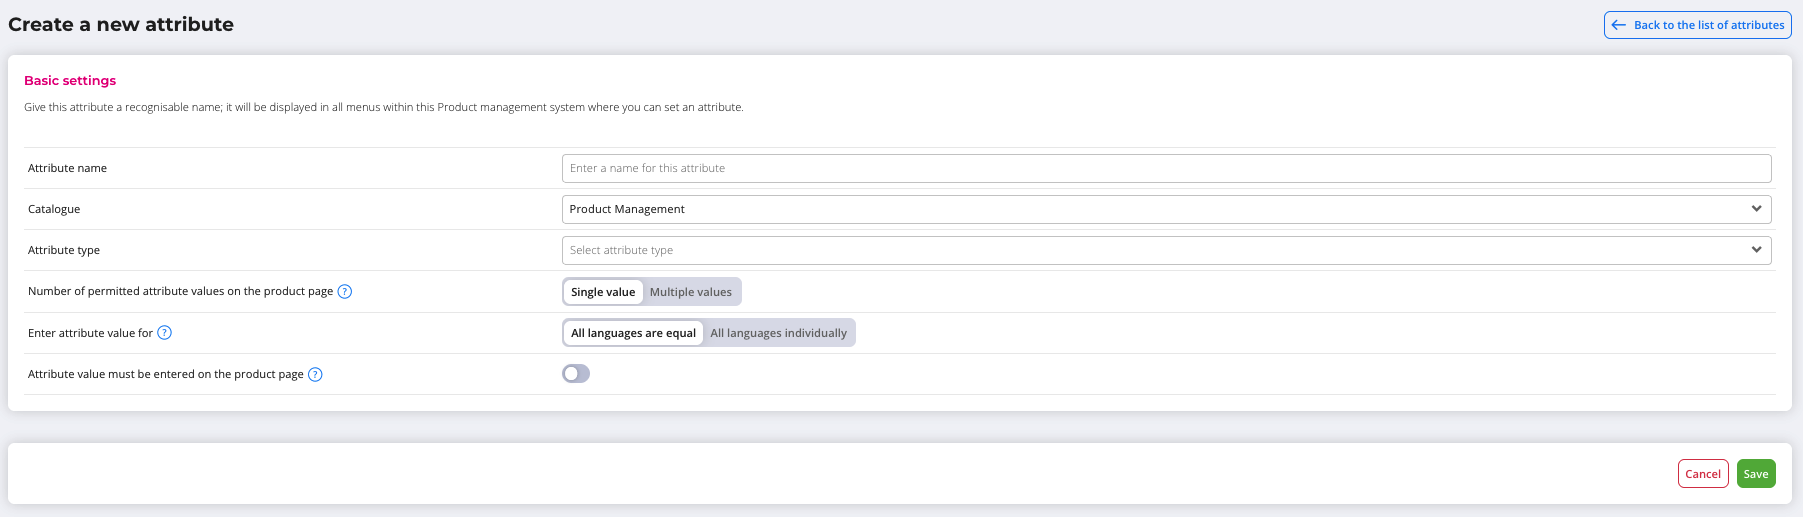
- Decide whether the attribute can have one value or multiple values. Yes/No can only have one value, all other types can have more. With multiple values, you can drag the values into order.
- Decide whether a value is required.
- Decide whether the value is filled in separately per language or is the same for all languages.
- For a dropdown list, you add the values. You can drag values to set the order and delete a value. The type of the values is text, whole number or decimal number.
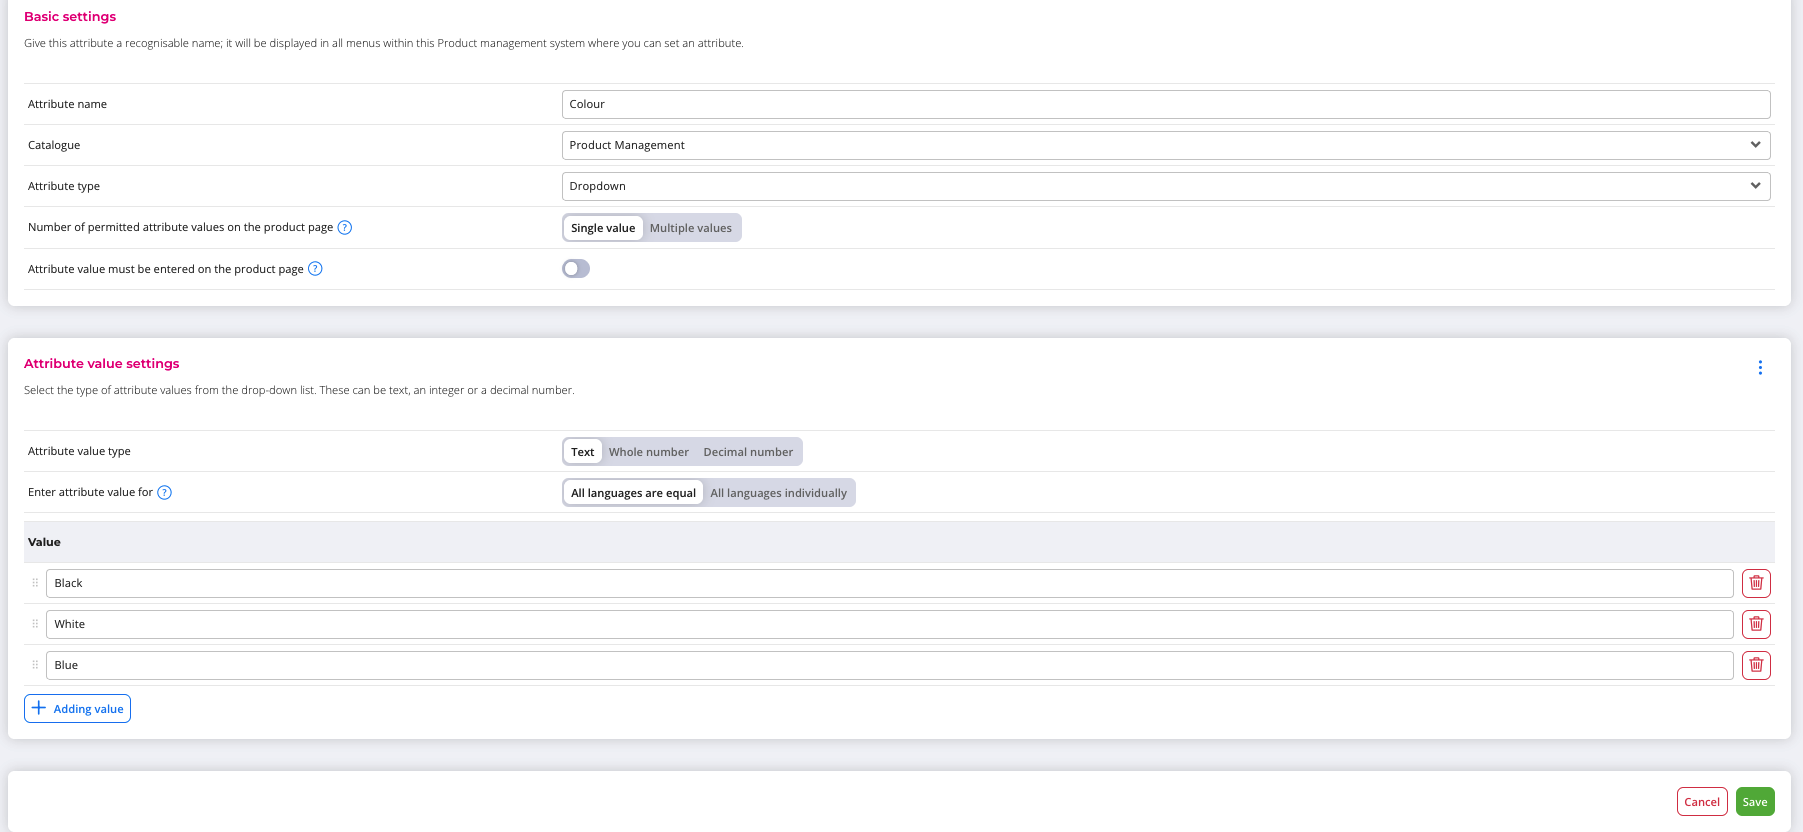
- Save.
These are the available types:
| Type | Use |
|---|---|
| Dropdown list | You choose from a fixed list of values |
| Text | Free input |
| Text editor (HTML) | Text with formatting |
| Numeric | Whole number or decimal number |
| Yes/No | A single yes/no value |
| URL | A web address |
| Date | A date |
| Date and time | A date with a time |
| Document | A file |
| Image | An image |
| EAN | An EAN, with a check while you fill it in |
ℹ️ Good to know: you set whether a value is required on the attribute itself. In an attribute group or template, you can't deviate from that. An attribute therefore can't be required in a group and optional as an individual attribute.
Editing an attribute
In the edit screen of an existing attribute, you see the attribute groups and the attribute template the attribute is linked to. From that screen, you can view them or unlink the attribute.
ℹ️ Good to know: unlinking removes the attribute from that group or template. The group or template itself remains. If that group or template is set on products, the attribute disappears there, together with the filled-in value. EffectConnect first shows a message with the number of products that have a value filled in and asks for confirmation. Those values will be lost.
Creating an attribute group
- Under New in the Attribute groups overview, choose the catalog (only if you have more than one catalog).
- Fill in the name of the group.
- Select the attributes that belong in the group. The list has no pagination, so you can easily drag the attributes to set the order.
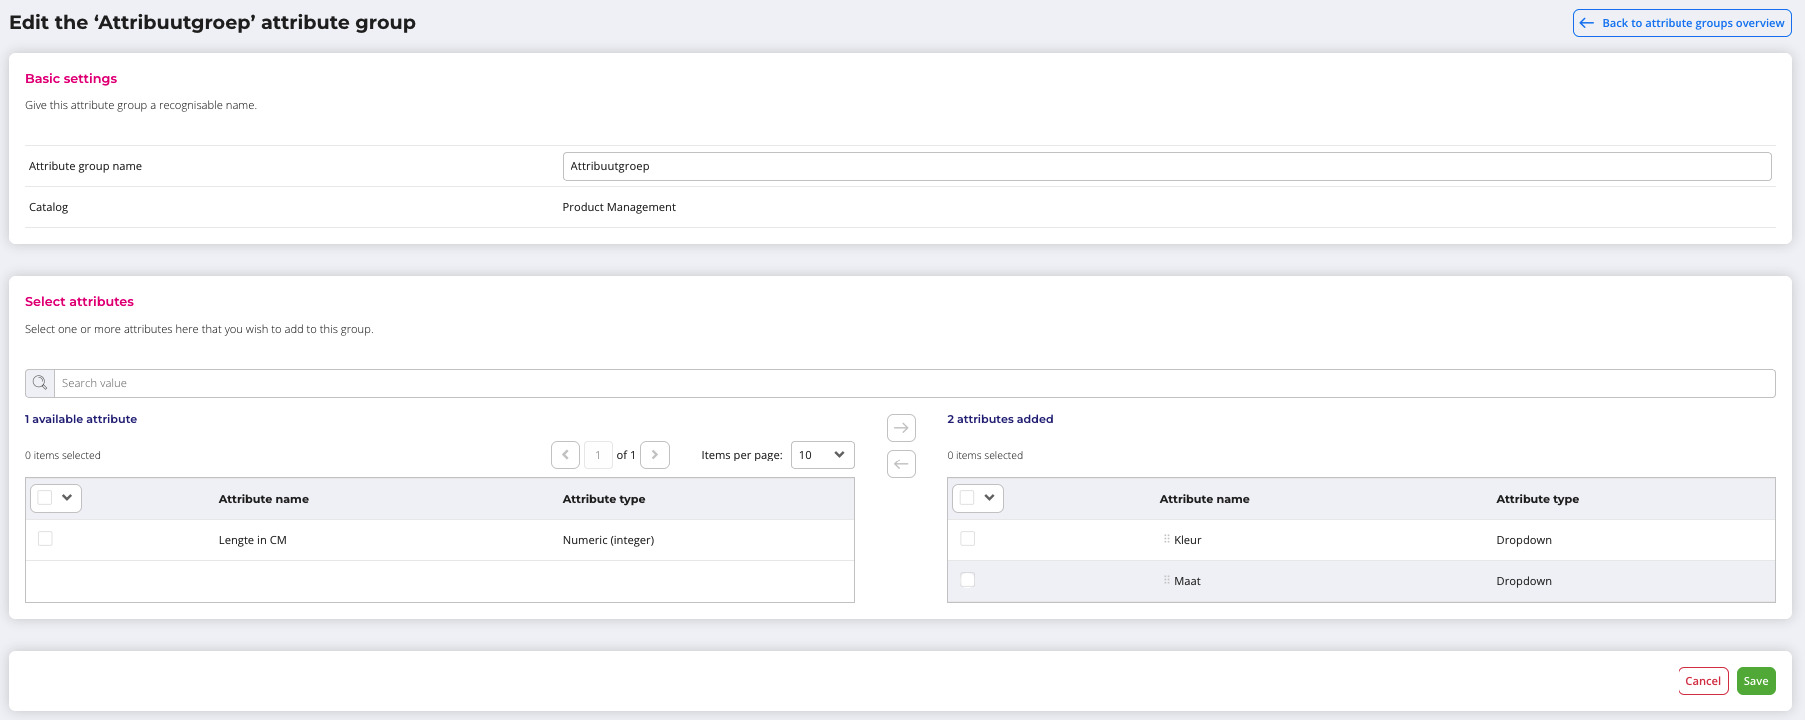
- Save.
A group contains a maximum of 50 attributes. You can link a group to any product type: simple product, main product, variant and bundle.
An example: if you sell T-shirts, you create a group with all attributes related to colour and design.
Creating an attribute template
- Under New in the Attribute templates overview, choose the catalog (only if you have more than one catalog).
- Fill in the name of the template.
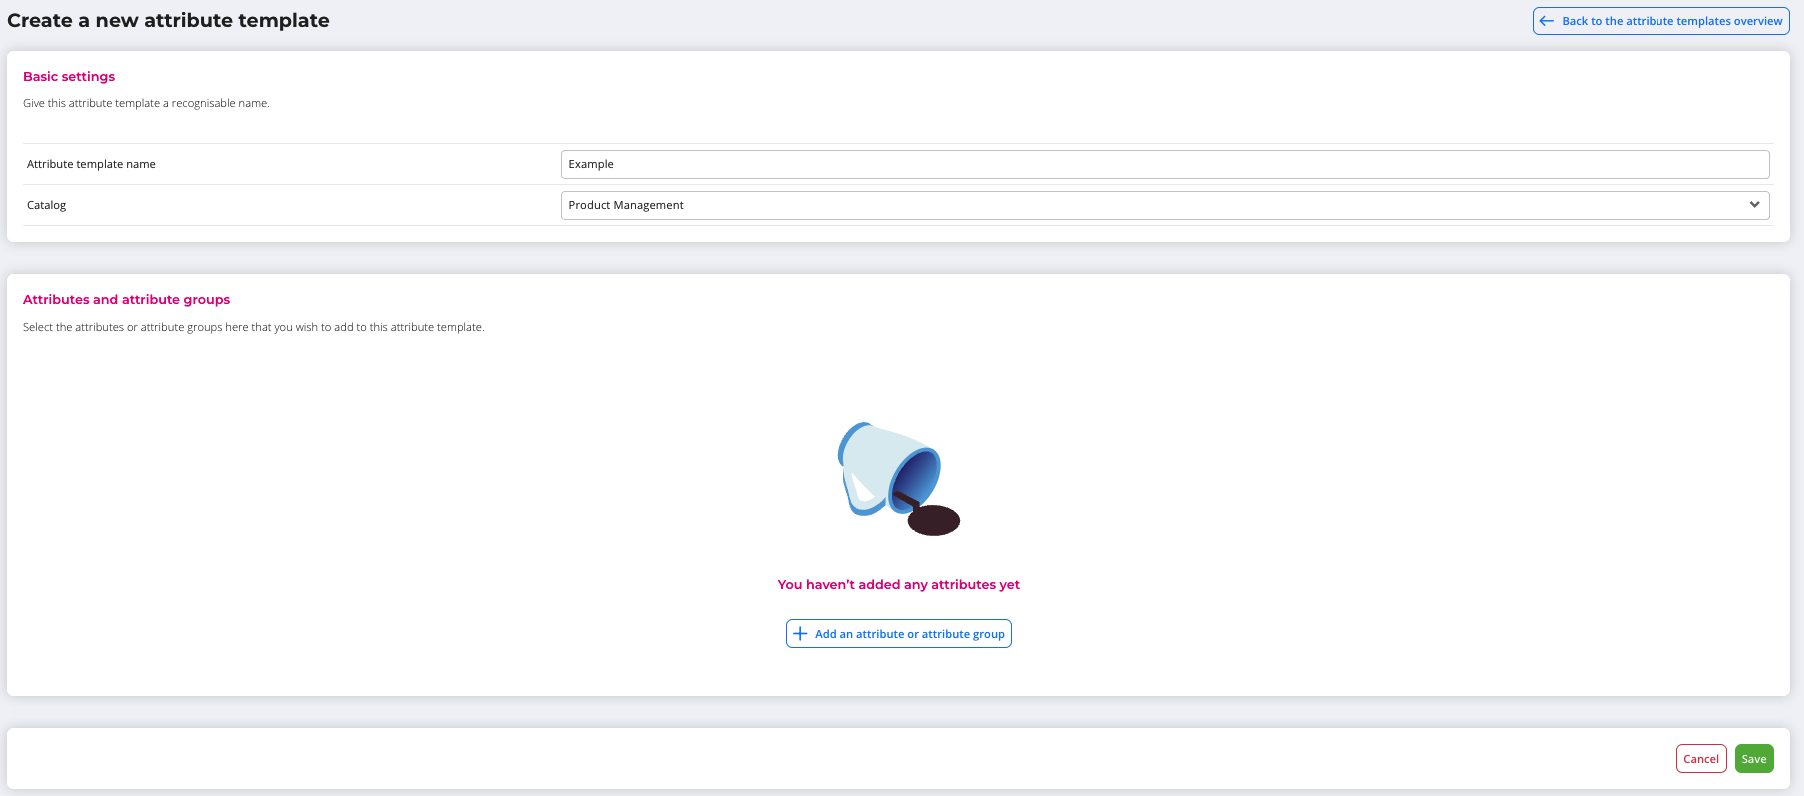
- Add the individual attributes and attribute groups that belong to this kind of product, usually per product group.
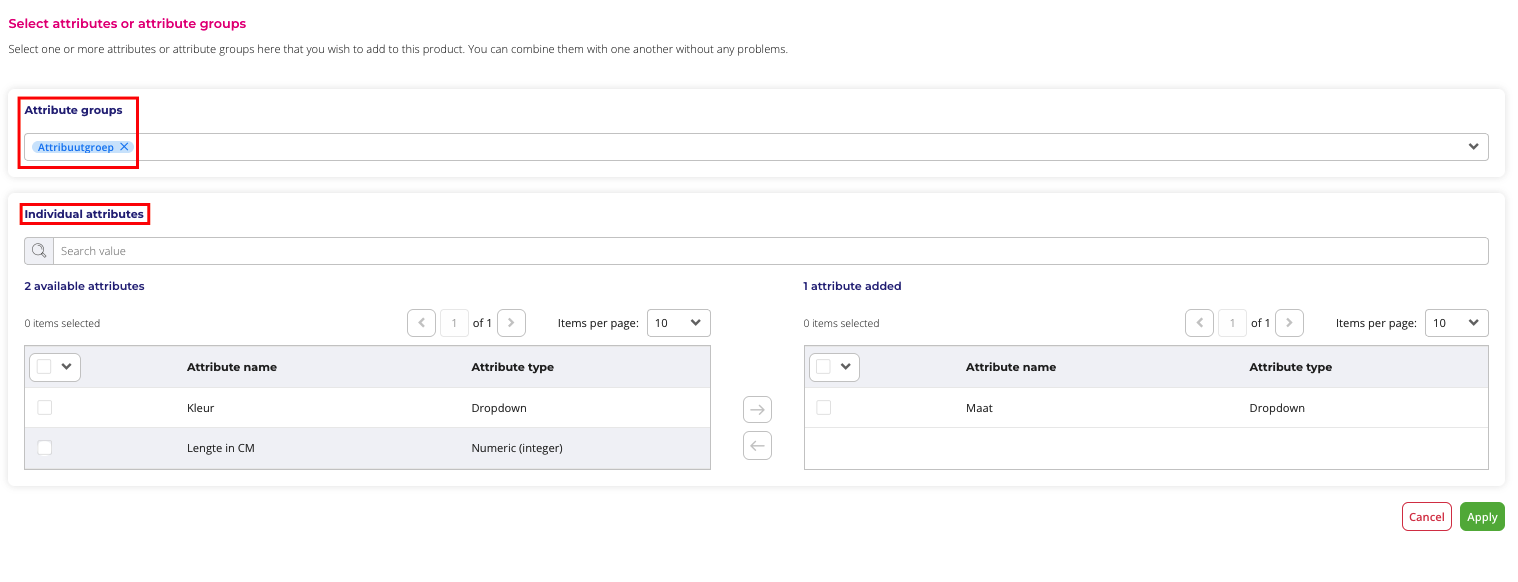
- Set the order by dragging. Individual attributes are always at the top, with the groups below them. You can drag both individual attributes and groups.
- Save.
With a template, you give a product all relevant attributes in one go, for example with the template "Trousers".
Linking attributes to a product
On the Attributes tab of a product, you link attributes either via a template or via a manual selection of attributes and groups. A combination of both isn't possible. This applies to all product types.
- The overview shows a card per attribute group. Individual attributes are in the group "individual attributes", in alphabetical order.
- The manual selection opens a slide-out panel with the available attributes and groups.
- With the filters, you show empty attribute values or limit the list to certain attribute types. An optional attribute is recognisable as such.
- If you switch templates, filled-in values are kept. If you switch back, the values of the fields that had disappeared are back. If you don't save, the switch is undone.
ℹ️ Good to know: for variants, you can only use attributes from the product catalog itself. By default, variants inherit the attributes of the main product.
In case you have any further queries, you can always contact us!
 Email us at support@effectconnect.com
 Contact us via chat or give us a quick call