![logo-effectconnect-liggend-2021.png]](https://www.effectconnect.com/hs-fs/hubfs/Logo%20EffectConnect/logo-effectconnect-liggend-2021.png?height=24&name=logo-effectconnect-liggend-2021.png)
With Product Management, you create four kinds of products: a simple product, a main product, a product variant and a bundle. Which type you choose depends on the product you want to sell.
Go to:
- Before you start
- How to start with every product type
- Simple product
- Main product
- Product variant
- Bundle
Before you start
You create products in a catalog that is meant for that purpose. If you don't have one yet, first create a catalog in Catalog Management with the purpose of creating products yourself in EffectConnect. You can have more than one of these catalogs.
🔗 See also: would you like to know more about working with multiple catalogs? Read the article What is Catalog Management and how do I work with multiple catalogs?
Choose the product type based on your situation:
| Situation | Type | What needs to exist first |
|---|---|---|
| A standalone product without options, for example a one size T-shirt | Simple product | Nothing |
| A product with versions, for example a T-shirt in red and blue, size M and L | Main product with product variants | The main product first, then the variants |
| A combination sold as a single item, for example 1 bottle of wine with 2 glasses | Bundle | The underlying products already exist |
How to start with every product type
- Go to Catalog > Product management > Products.
- Click Create new product.
- Do you have more than one catalog to create products in? Then first choose which catalog the product goes in.
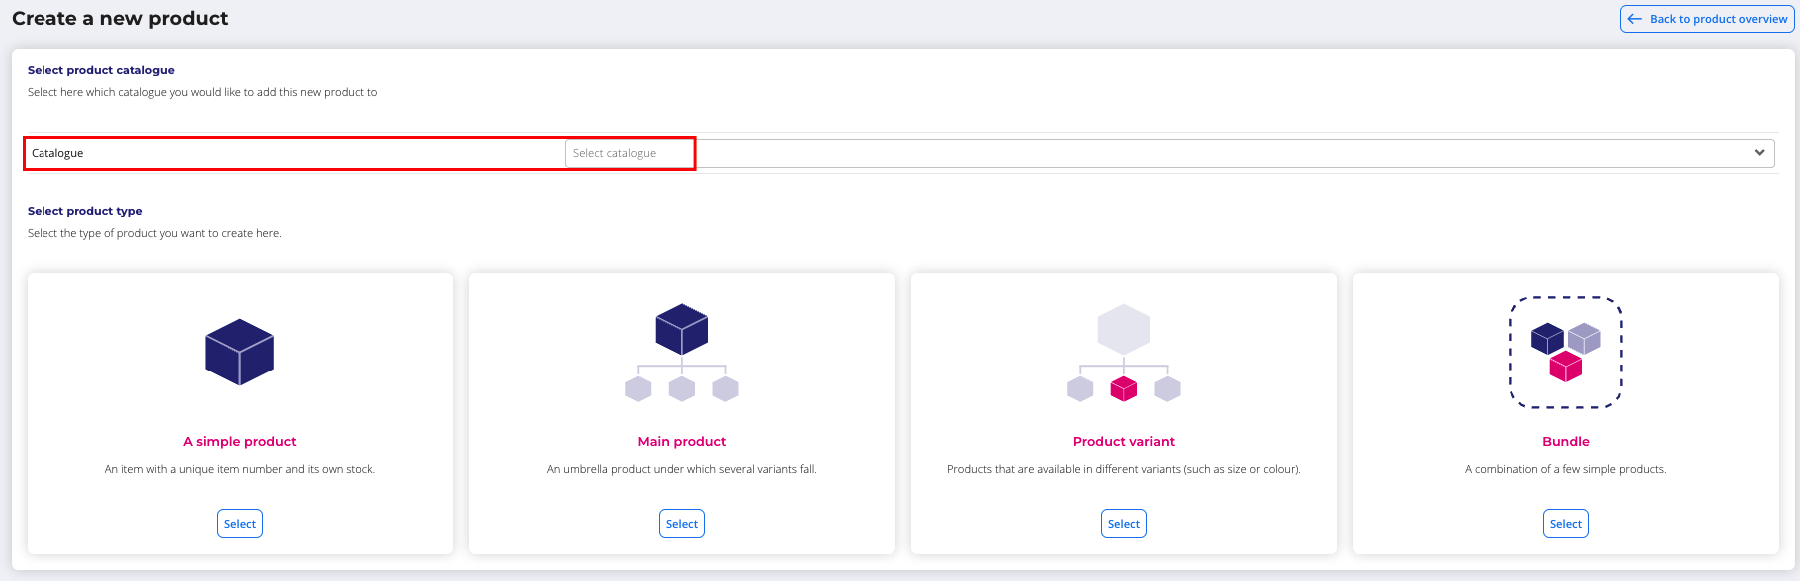
- In the selection screen, choose the product type.
- Fill in the product (see below per type) and save.
This applies to all types:
- The edit screen has the tabs Product properties, Attributes, Images and Advanced settings. An asterisk in a tab title means you have changes on that tab that haven't been saved yet.
- In a multilingual catalog, a blue language bar appears at the top. Use it to fill in the product per language. The bar stays in view when you scroll.

- In price fields, a full stop is automatically converted to a comma.
- After saving, the product also appears in the regular products overview. You make changes in Product Management, via the button in the top right of the product detail page or via Product management.
🔗 See also: would you like to know more about the regular product detail page? Read the article Product detail page.
Simple product
A simple product has one SKU and one EAN, no options and its own stock.
- Under Create new product, choose the type Simple product.
- On the Product properties tab, fill in the basic information: product title, SKU and EAN (optional). You pick the brand from the list of brands. To edit or add brands, click the three dots at the end of the Brand row.
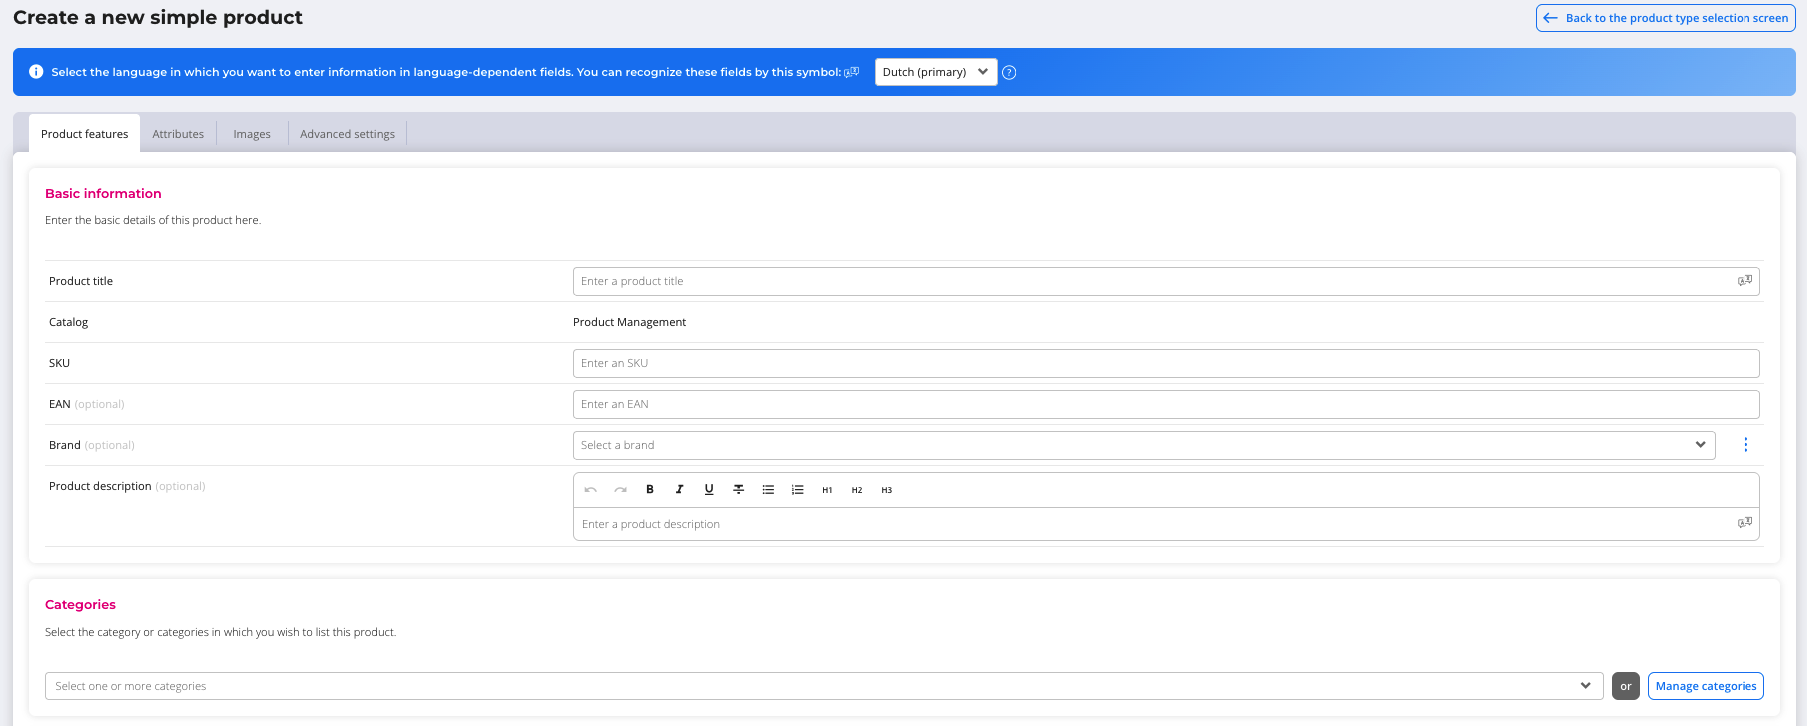
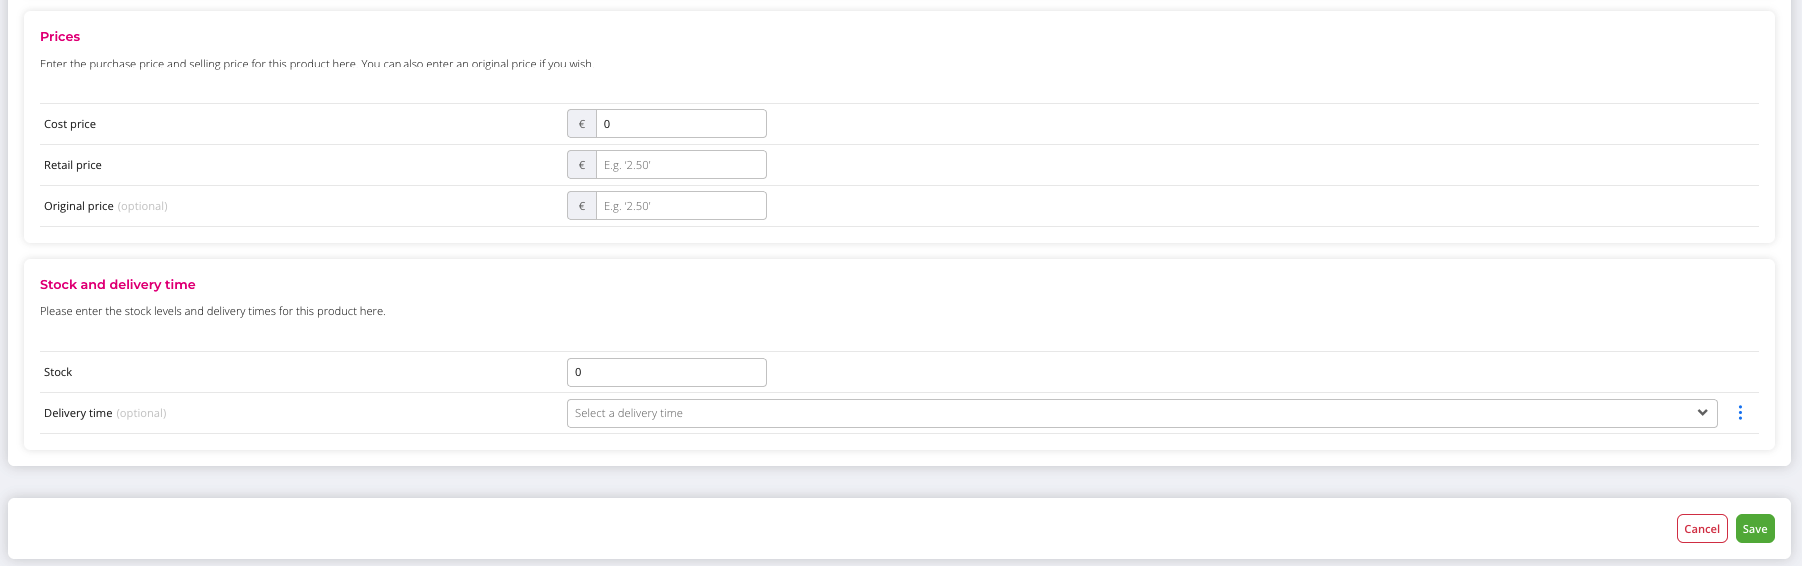
- Choose the categories. If you click a parent category, all subcategories are selected or deselected with it. A checkmark means everything below it is selected, a blue square means only part of it is selected. Is a category missing? Then create it directly from the product via Manage categories.
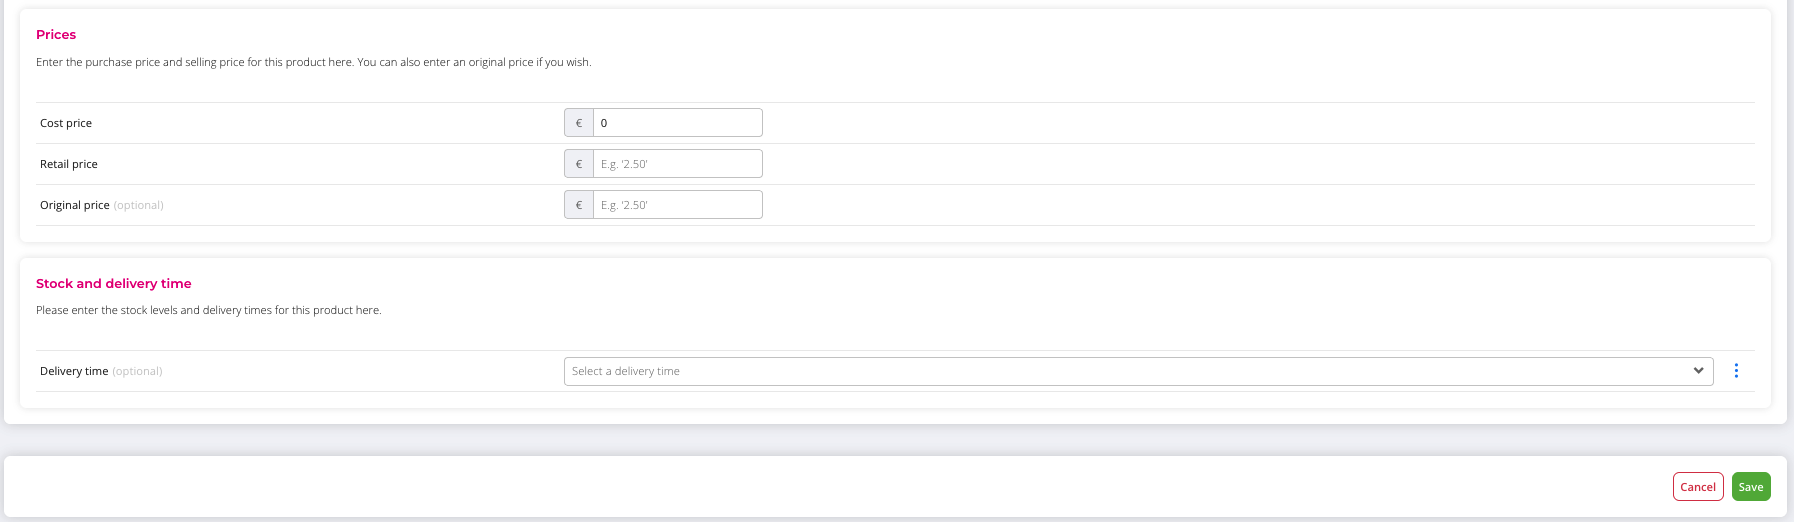
- Fill in the prices (purchase price, sales price and original price), the stock and the delivery time. Purchase price, sales price and stock can be 0.
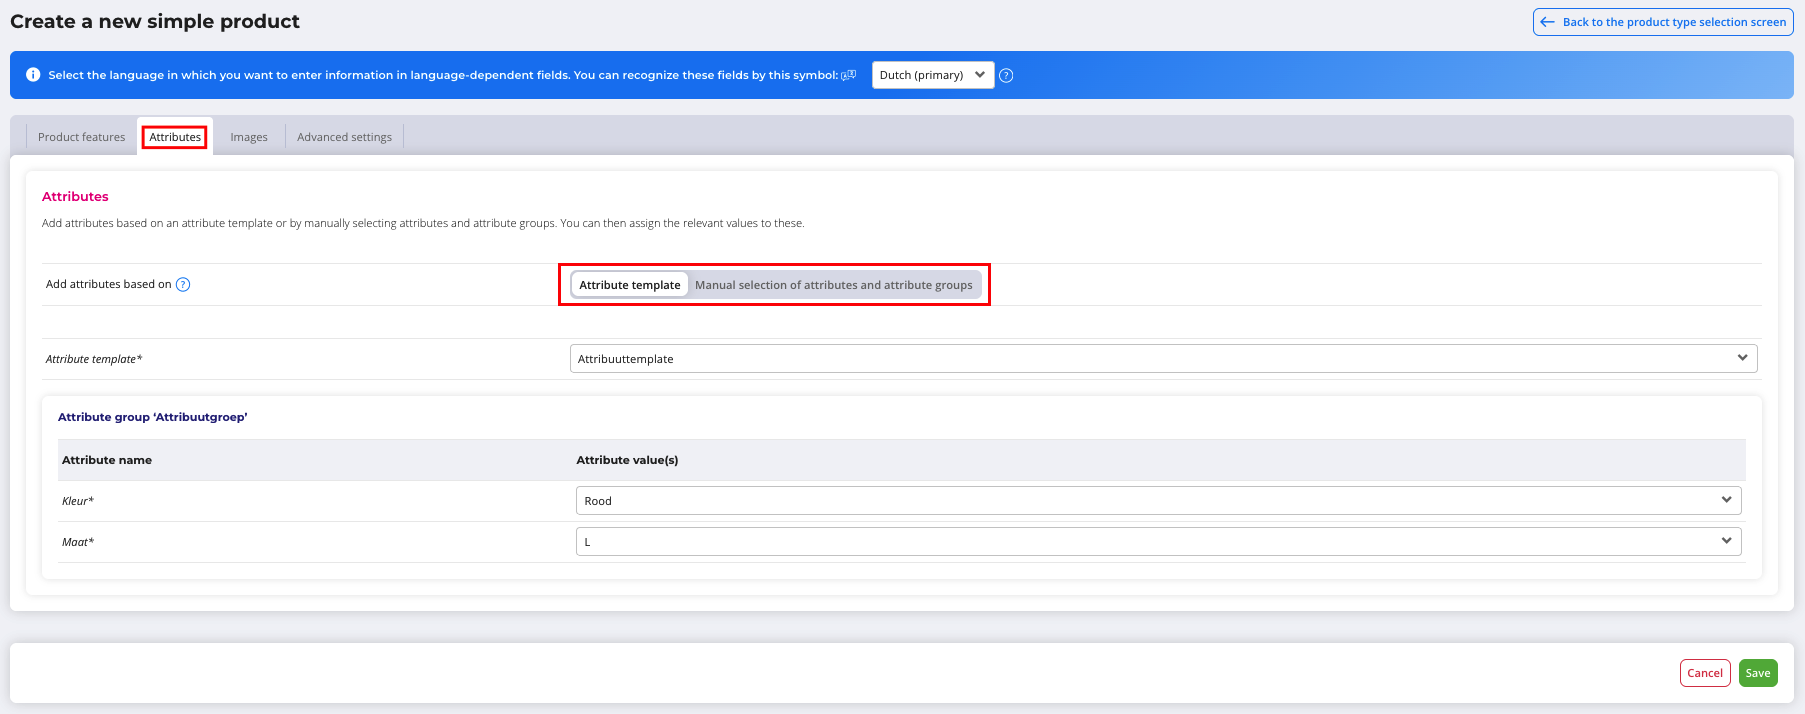
- Go to the Attributes tab and link attributes via an attribute template or via a manual selection of attributes and attribute groups. A combination of both isn't possible. The overview shows a card per attribute group. Individual attributes are in the group "individual attributes", in alphabetical order.
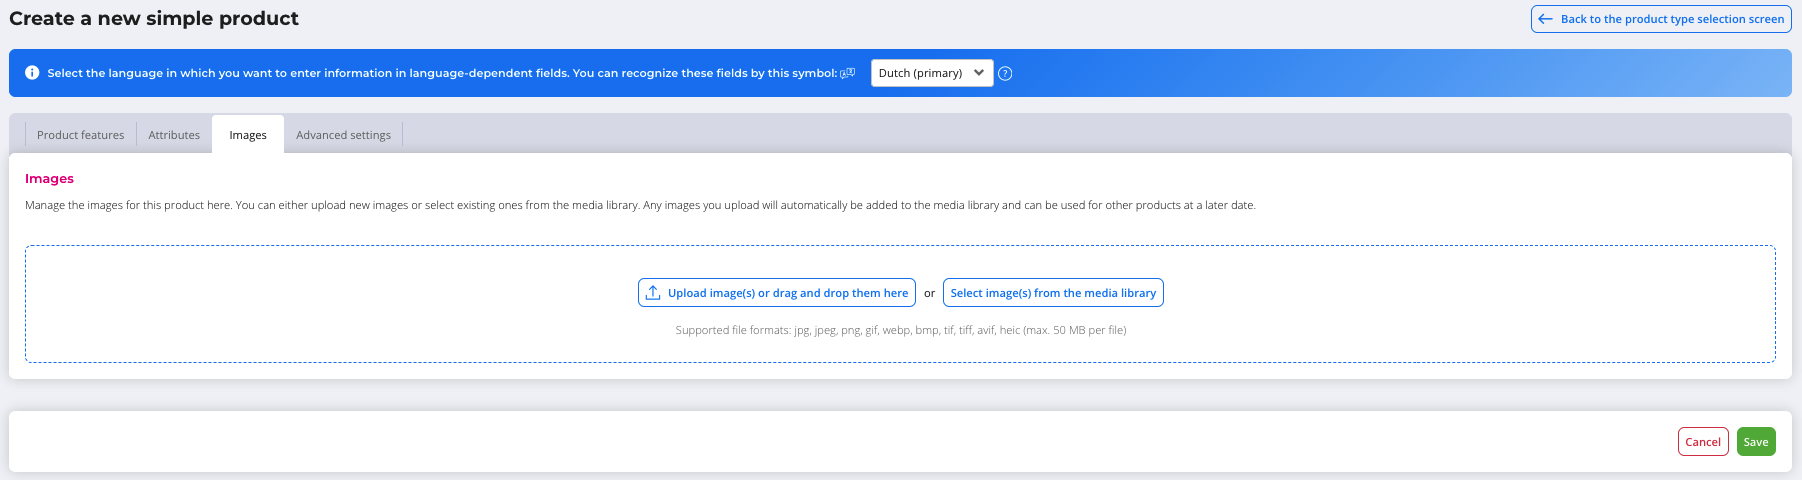
- Go to the Images tab. Upload images or choose existing images from Media management. A new upload automatically ends up in Media management as well. You change the order by dragging.
- The Advanced settings tab is optional.
- Save.
ℹ️ Good to know: these fields are required when you save: product title, SKU, purchase price, sales price and stock.
Stock changes, whether they come from orders, are made manually or are sent via the API, show up in the mutation log under stock.
Main product
A main product is the overarching product that variants fall under. You manage shared information, such as brand, material and description, centrally here.
- Under Create new product, choose the type Main product.
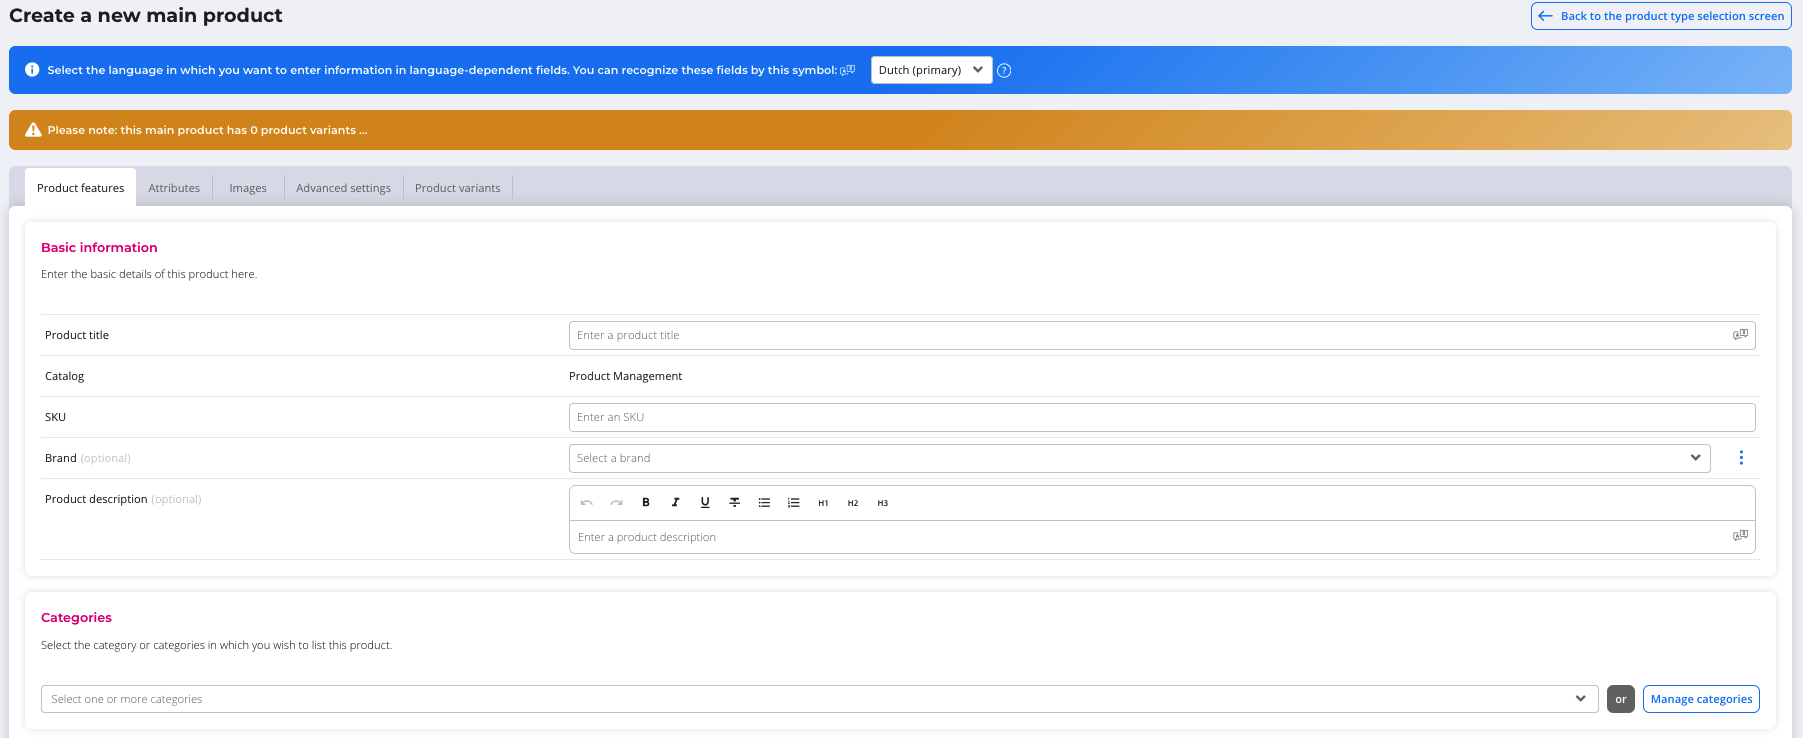
- Fill in the shared information on the same tabs as for a simple product. A main product has no EAN and no stock.
- Images you add to the main product end up in the catalog at product level.
- Save.
- Then create at least one variant on the extra Product variants tab (see the next heading).
ℹ️ Good to know: a main product only ends up in your regular EffectConnect catalog once it has at least one variant. Without variants, the screen shows an orange warning.
Product variant
A variant always belongs to a main product and has its own SKU, EAN, price and stock. If the main product doesn't exist yet, create it first.
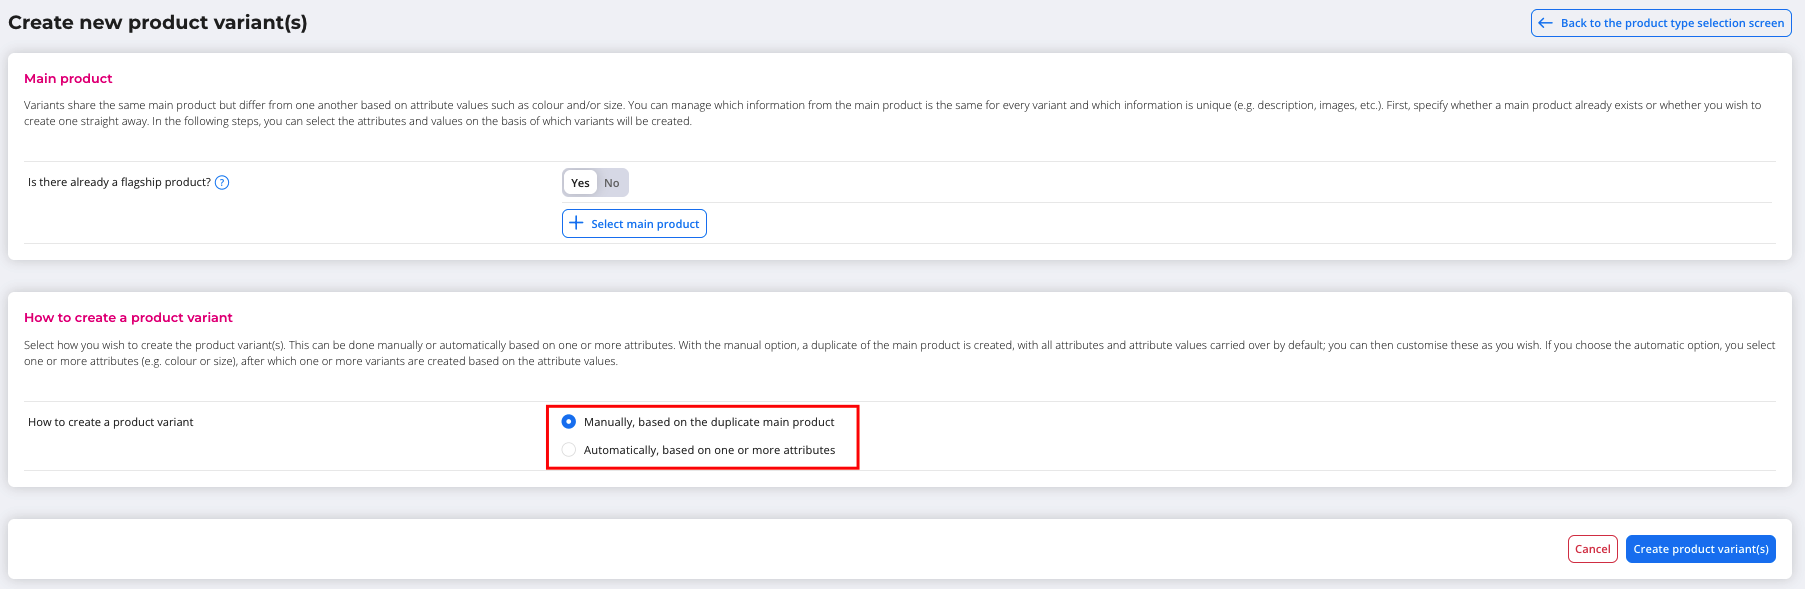
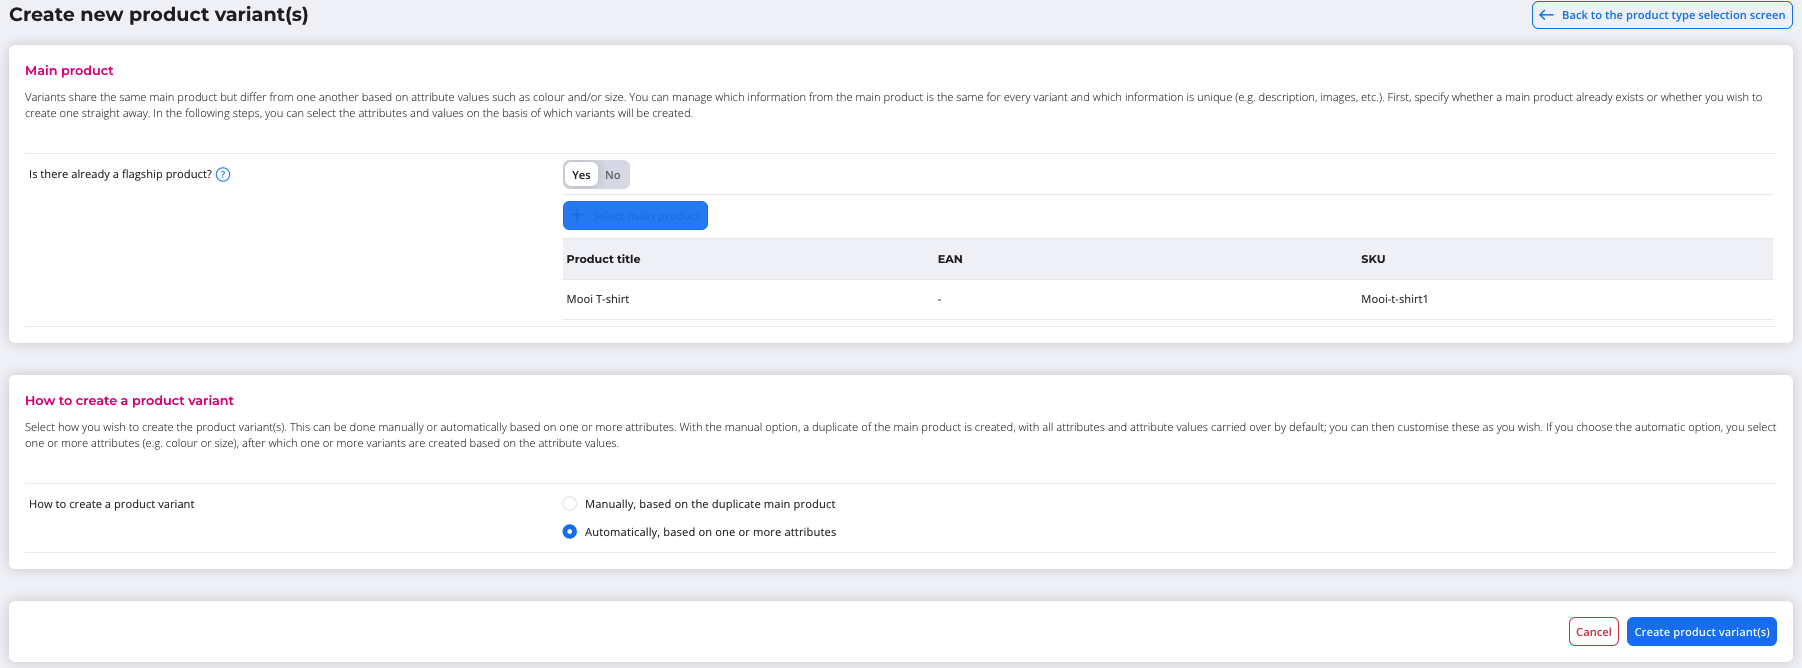
You can start a variant in two places: on the Product variants tab of the main product, or via Create new product with the type Product variant, where you select the main product. After that, you choose between manual and automatic.
Creating a single variant manually
- The screen looks like that of a simple product. Brand and categories come from the main product and can't be changed.
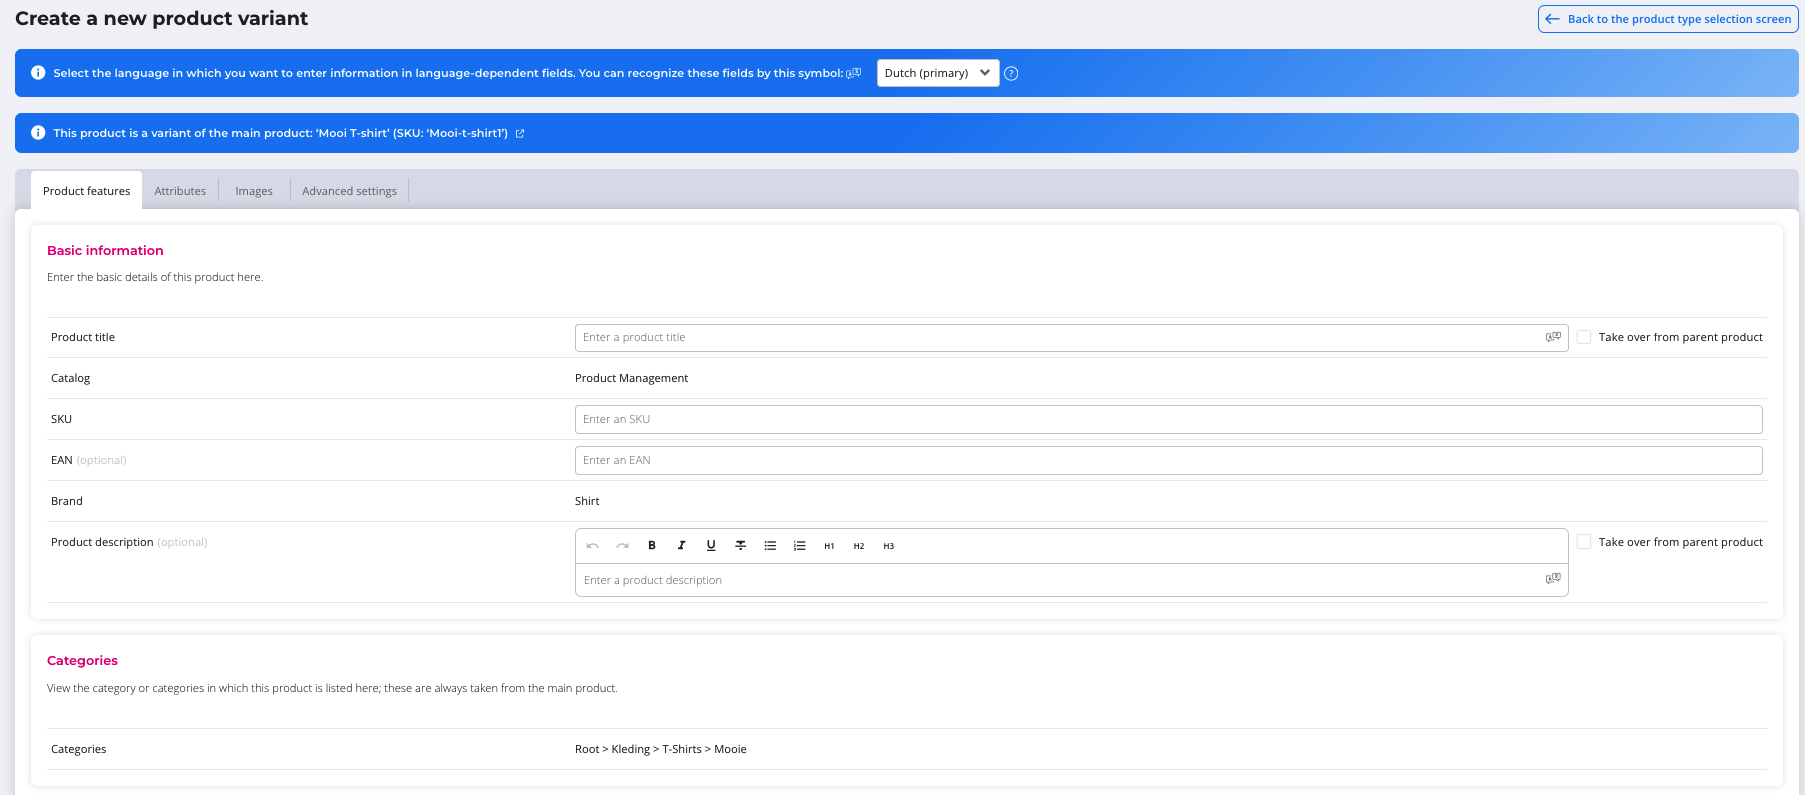
- The product title is filled in automatically, but the checkbox "inherit value from main product" is off. You can therefore change the title separately. SKU and description stay empty and are not linked to the main product either.
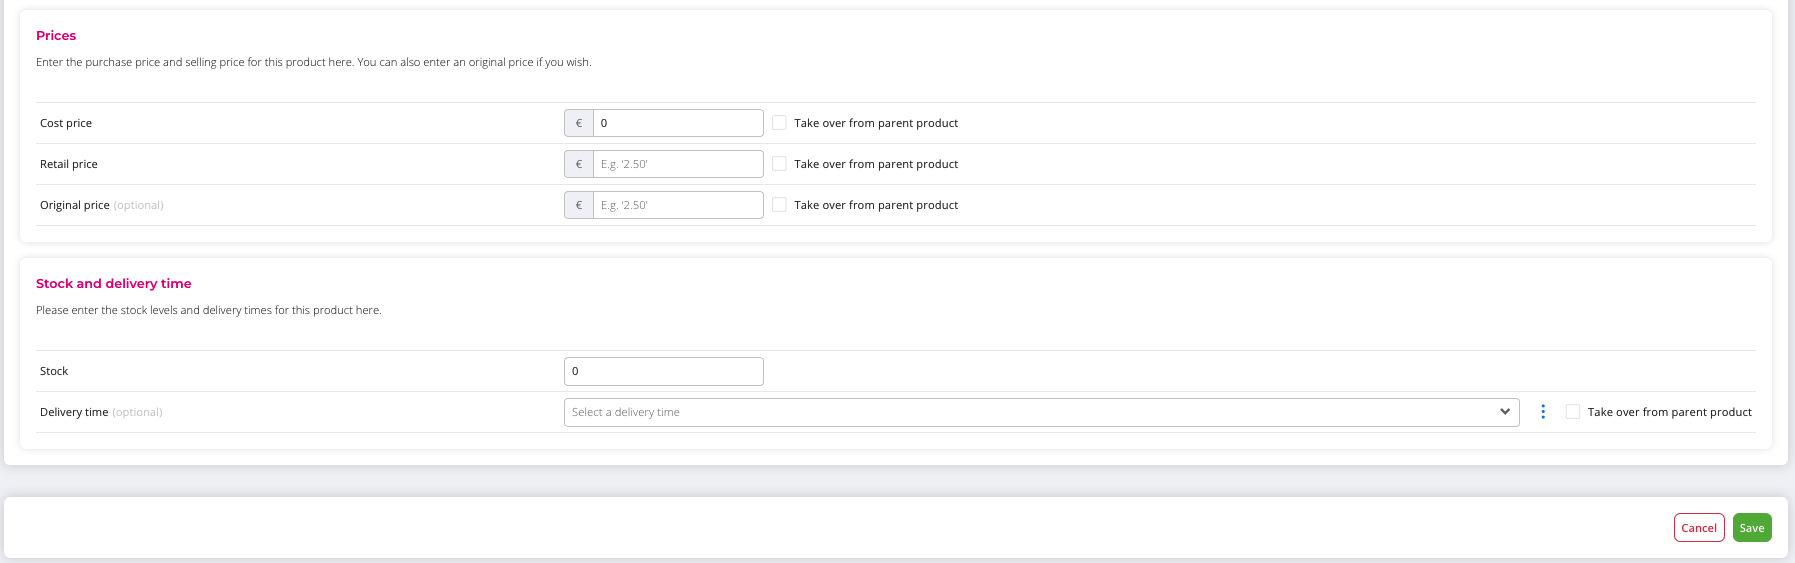
- Fill in the SKU, the EAN and the stock. Stock isn't inherited from the main product, because it doesn't exist there.
- Other fields, such as prices and delivery time, are inherited from the main product by default. You can turn this off per field.
- On the Attributes tab, "inherit attributes from main product" is on by default. As long as it's on, attributes and attribute groups are inherited with their values and you can't remove attributes from the variant. If you turn the checkbox off, you can.
- Save.
Creating multiple variants automatically
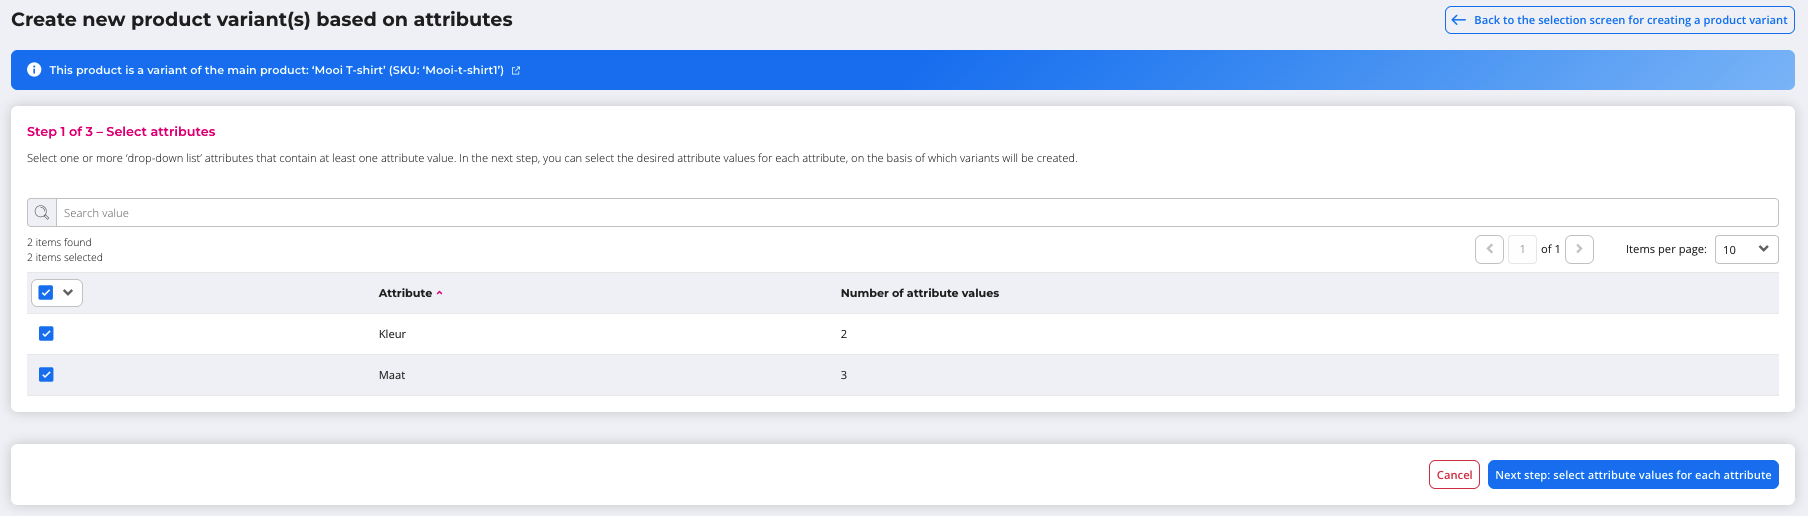
You go through a wizard with three steps.
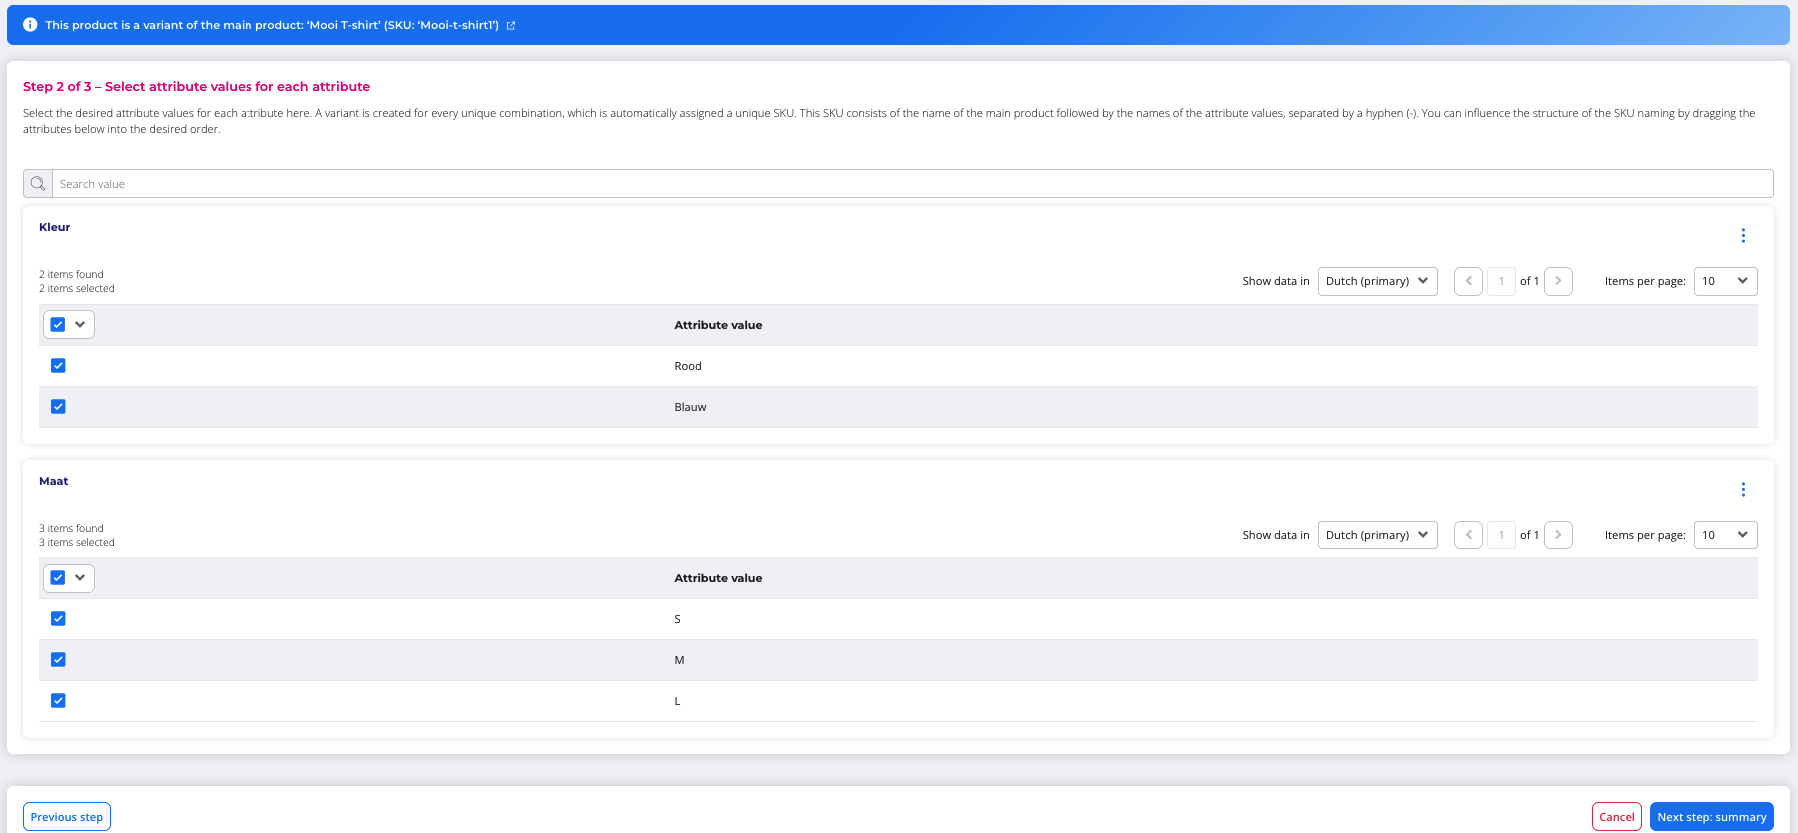
- Select attributes: choose the attributes the variants are based on, for example colour and size. You can only choose attributes from the product catalog itself, not from other sources in EffectConnect.
- Select values: all values are shown per attribute. Nothing is preselected, you choose yourself. Here you can also add new values or remove an entire attribute from the selection.
- Summary: an overview of all variants that will be created, with a suggested name and SKU that you can adjust before confirming. By default, all variants are selected.
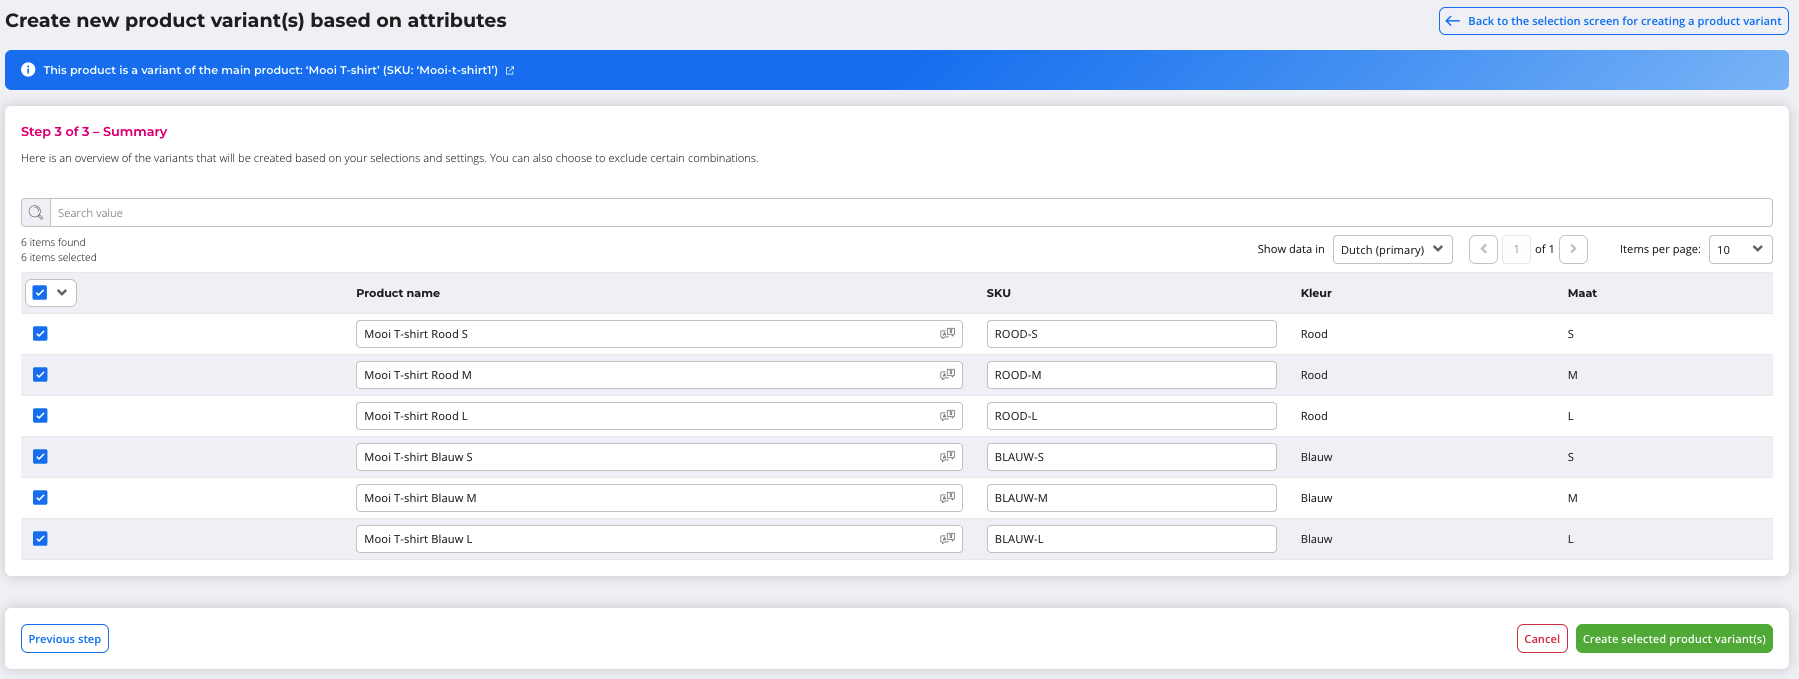
An example: two colours and three sizes give 2 × 3 = 6 variants.
ℹ️ Good to know: the maximum is 250 variants per main product. If your selection goes above this, step 3 shows an orange bar saying the maximum has been reached. Select or deselect variants and generate again.
ℹ️ Good to know: if a combination already exists on the main product, step 3 points this out with a small triangle and an orange bar. This is a warning, not a block: you can still create the variant again.
ℹ️ Good to know: if creating one variant fails (for example because the SKU already exists), the other variants are still created. Afterwards, you can see which variants weren't created and why.
Bundle
A bundle is a regular product with its own SKU and EAN, made up of 2 or more underlying products (simple products or variants). Because the bundle ends up in your regular catalog as a normal product, it works with mapping, the Repricer, product selections and the Fulfilment manager.
Requirements: the underlying products already exist and all come from the same catalog. This can also be a catalog that wasn't created for Product Management, for example the products of a connected webshop. Combining products from a Product Management catalog with products from a catalog that is filled via an API is not possible.
- Under Create new product, choose the type Bundle.
- Choose the underlying products (at least 2) and the quantity per product.
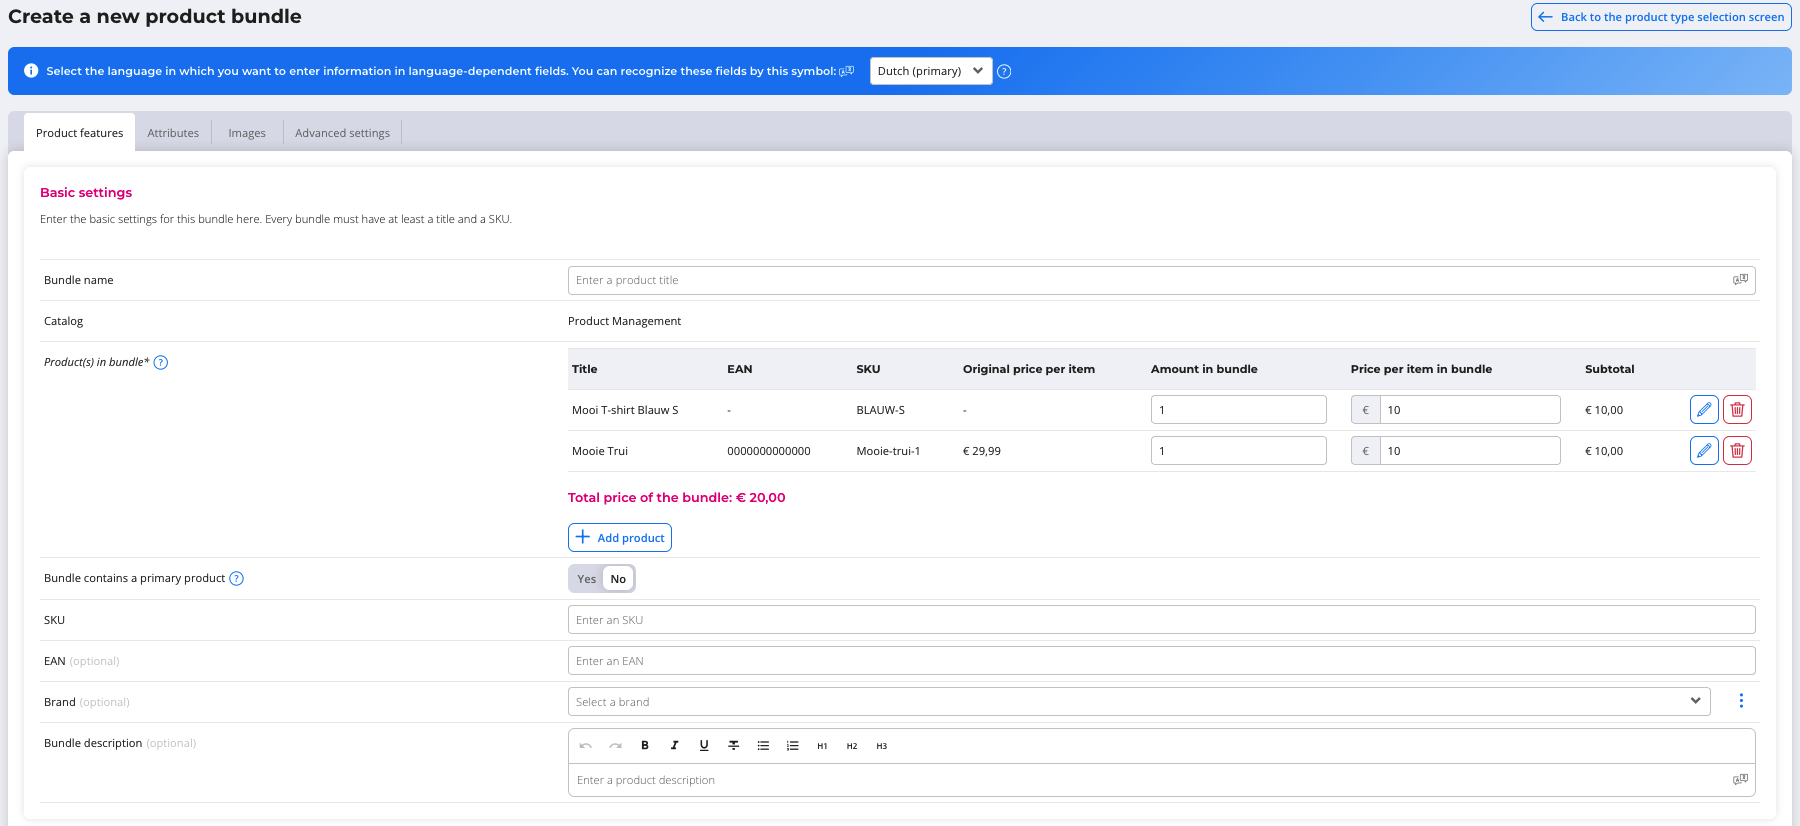
- Choose a primary product. It determines which catalog you can choose further underlying products from, and provides default values for things like category, delivery time and attributes.
- Fill in the SKU and the EAN yourself.
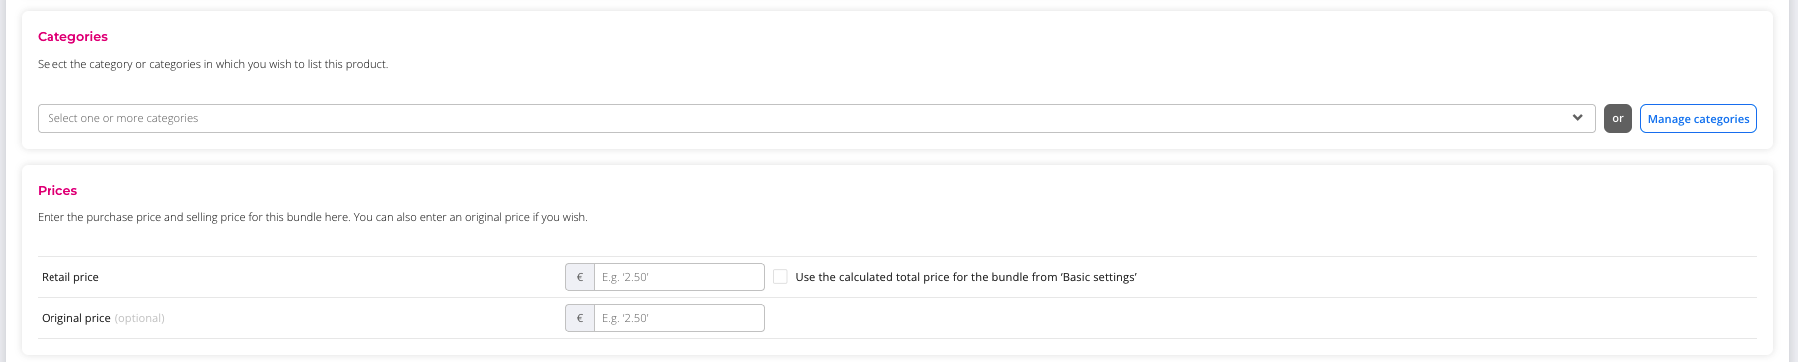
- You don't need to fill in the purchase price. It's calculated automatically as the sum of the purchase prices of the underlying products.
- PLEASE NOTE: if an item in a bundle has a purchase price of 0 and another item in the bundle has a purchase price of 10, the purchase price of the bundle will be 0. If you enter an actual value for the item with a purchase price of 0, the purchase price can then be calculated.
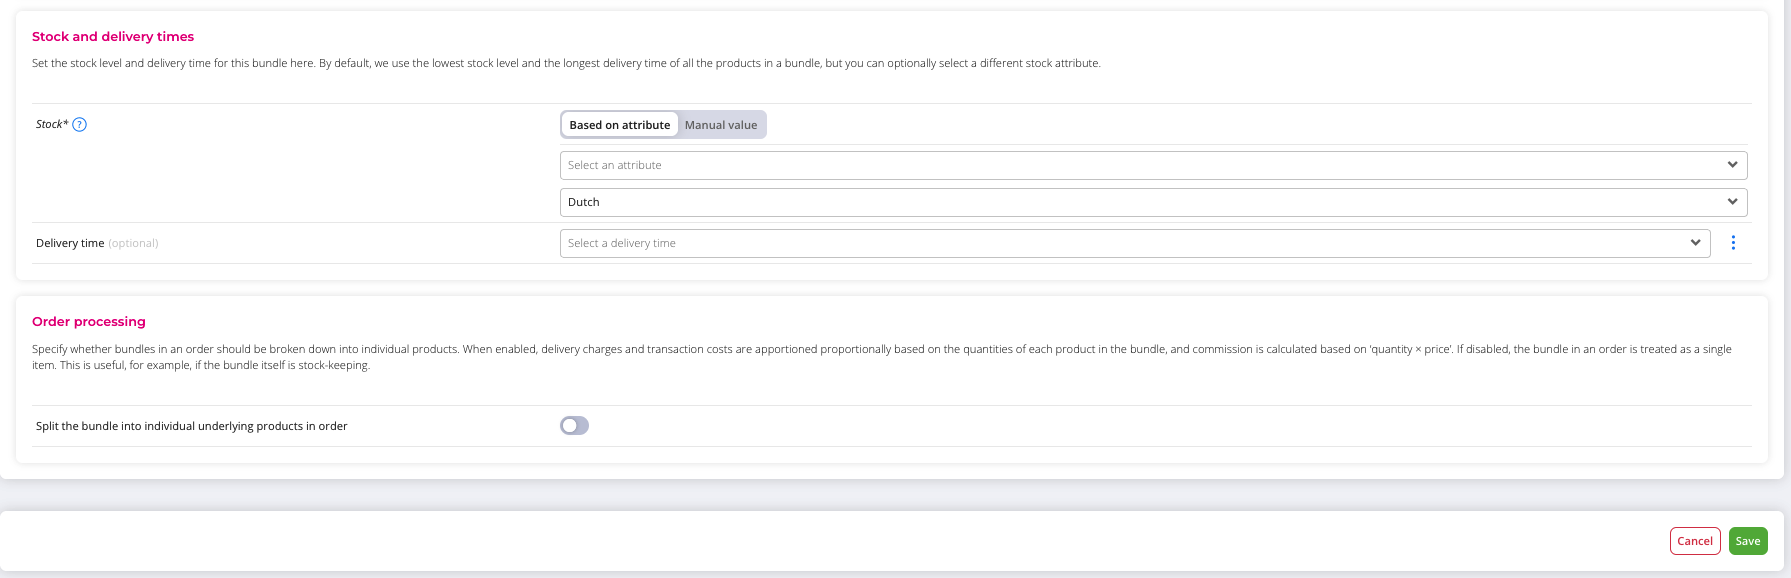
- Decide how the stock of the bundle is determined (see below).
- On the Attributes tab, choose whether attributes are inherited from the primary product. If that's off, you link a template yourself or add individual attributes. For numeric attributes, you can also use the lowest value or the sum of the underlying products.
- Check the setting Split bundle in order into individual underlying products (see below).
- Save.
Stock of a bundle
How the stock of the bundle is determined and what is deducted when an order comes in depends on the stock setting and on whether the underlying products come from Product Management.
| Stock of the bundle | Products from Product Management: deduction when an order comes in | Other products (for example from a webshop): deduction when an order comes in |
|---|---|---|
| Based on attribute | The underlying products | Nothing, the source system takes care of this |
| Manual value | The bundle itself | The bundle itself |
Orders of a bundle
The setting Split bundle in order into individual underlying products splits the bundle into separate products in the order. Shipping and transaction costs are then divided based on quantity, and the commission based on quantity × price. The setting is on by default.

ℹ️ Good to know: for a bundle with products that don't come from Product Management, this setting isn't visible and the split behaviour always applies.
Bundle of products outside Product Management
This works in a more limited way. The bundle can't take anything over from a main product for the primary product. The images of those products are regular URLs and are therefore not in Media management.
ℹ️ Good to know: a bundle has no revisions. If you change the contents of an existing bundle (different products or different quantities), there may be a period in which the old version is still being ordered while EffectConnect assumes the new one. If the products in a bundle change, we therefore recommend creating a new bundle with a new EAN.
In case you have any further queries, you can always contact us!
 Email us at support@effectconnect.com
 Contact us via chat or give us a quick call