Go to
What are custom attributes?
Custom attributes are extra attributes that you create in EffectConnect based on conditions and actions that you can set yourself. You can use the values that we retrieve from your webshop/ERP system or enter them manually.
Where do you use custom attributes in EffectConnect?
You can use the newly created attributes everywhere in EffectConnect, such as in:
For products for which this attribute is relevant, a tab with custom attributes will be displayed next to the product in EffectConnect.
Create custom attribute
You can find the module at Catalog > Custom attributes.

1. Click on the blue button to create a new custom attribute![]()
2. Complete the basic settings
Enter and select which products you want to set a value for:
- For all products, or
- Only for products that meet certain conditions
- Also select the catalog language to which the values may be matched
- Also select the catalog language to which the values may be matched
3. Live preview
You can choose to see a live example so that you can check whether the result of the custom attribute is as desired and correct.
Select a specific product or a random product yourself.

4. Complete condition block 1
The conditions are constructed with if-then-and-or rules .
IF
In the first condition block (If) you indicate which attribute you want to use (+ possibly an 'or' condition) to which the new custom attribute applies.
Here you can also see how many products meet these conditions and you can view the product list as a check.

THEN
Below that you can use all possible values and combinations.
Fixed value
The set value is fixed and is automatically assigned to all products that meet the conditions for this custom attribute, for all languages.
Fixed value per language
The set value is fixed, but can be entered separately per catalog language.

Attribute
Select an attribute and the language of the attribute value for the custom attribute.

Actions
Generates a new attribute based on changes, combinations and calculations on existing attributes.
Start value: choose an attribute or enter a text
Actions to be performed:
- Advanced
- HTML stripping
- Coding
- Linebreaks
- Calculation
- Add
- Subtract
- Multiply
- Divide
- Edit text
- Make lowercase letters
- Capitalize
- Filling up
- Cut off
- Remove
- Concatenate
- Example: combine size with gender characteristic , such as S-Male.
- Filter
- By ordinal or numerical
- Numerical
- Round to
- Minimum value
- Maximum value
- Join
- Without/with characters in between
- Split
- By index
- On regex
- By text
- Replace
-
- Example: find the words 'dark green' and replace them with 'green'.
Example of the action 'concatenate':
Desired outcome: Combine the 'option title' starting value with the 'Size NL' attribute, separated by a space.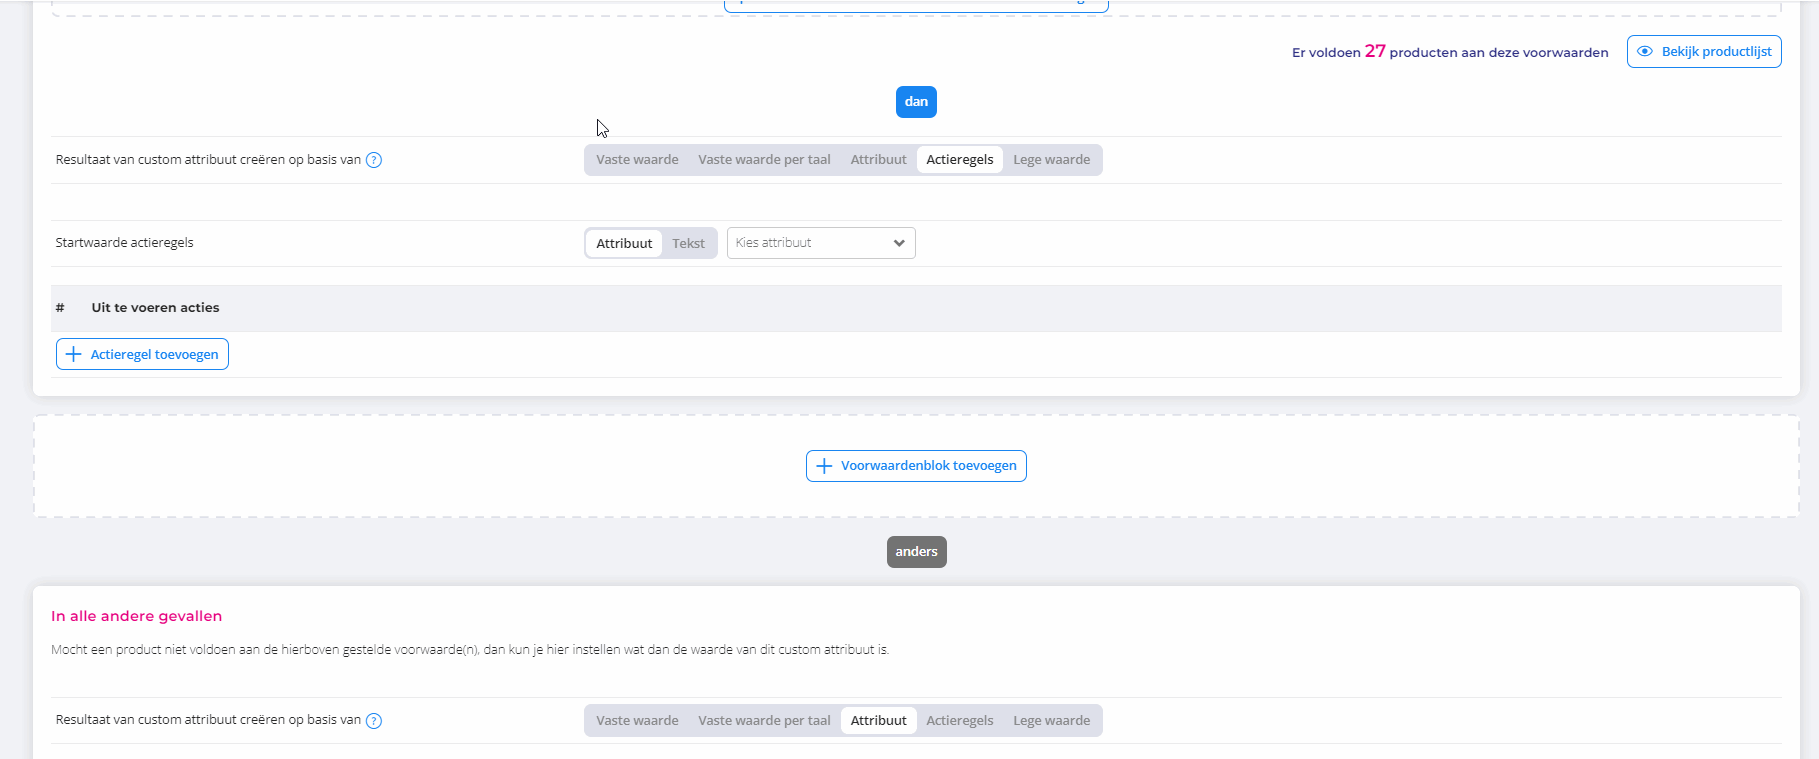
Empty value
An empty value is used when working with conditions, for example, if product A and B meet a certain condition, then assign "a value", otherwise calculate no result, resulting in an empty value for all other products.
5. Add another condition block - optional

6. Set your default value
OTHER
If a product does not meet the set condition(s), you can set here what the value of this custom attribute should be.
7. Click save
![]() Please note that when you create or change a custom attribute, the adjustments will be visible in EffectConnect within 3 minutes.
Please note that when you create or change a custom attribute, the adjustments will be visible in EffectConnect within 3 minutes.
8. Find the newly created custom attribute
You can locate the custom attribute on the product page of the relevant products, allowing you to utilize it wherever it is needed within EffectConnect.

Edit custom attribute
Go to the module via Catalog > Custom attributes
Select the custom attribute you wish to edit, then click on the blue pen icon next to it.